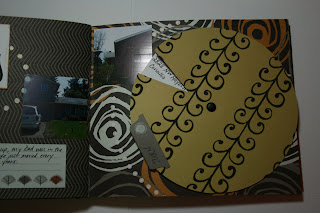
 Cut out the "Places" word from your Typography PDF. Then ink the edge. On the left side, journal appropriately. On the right side, we'll have our first interative element to the book.
 You'll want to cut out a circle for this. You can do this several ways: Coluzzle, EK Success Curvy Cutter, trace a small bowl or dessert plate, go old school w/a compass....it really doesn't matter. Cut out a triangular shaped notch in your circle. I used my Marvy Uchida Clever Lever Country Triangle Punch for both the notch and the triangles I wrote my selected addresses on. (I've moved over 50 times, so I only selected a few of my addresses). Then I used a tab from my SEI Madera Island Collection Pack so that there would be something to hang onto while spinning the wheel. TIP: use the notch on your wheel to help you position what's underneath the wheel. What I mean is, put the wheel on your page first, then lift up the edges and place what you want to be read in the notch exactly where the notch falls on the page. Another tip: Use a chipboard circle as a coaster UNDER the wheel so that the wheel spins freely. Attach the wheel with a brad. Use a paper piercer or a push pin or an anywhere punch to make your hole. Remember that the legs of the brad will show through to the other side of your page (since we are using double-sided paper). We'll cover those up in the next section of the book.
Once again, I decorated/embellished my page with my Crafter's Workshop templates and my Uniball-Signo white pen. I also used flocked paper on purpose for my wheel; I wanted something tactile for this interactive element.
That's all for today! Enjoy!


No comments:
Post a Comment